24/7 EMERGENCY SERVICE AVAILABLE (619) 202-5726

Indoor Air Quality, Filtration and Add-ons


Quicklinks to other articles in this series:

What Are Filtration and Indoor Air Quality?

The filtration in your comfort system refers to the air filter. Filters have porous membranes to trap pollutants and particulate matter, such as pet dander, mold, smoke, dust, and bacteria.

Indoor air quality refers to the air quality within a building or structure; poor IAQ is closely related to health effects. Low indoor air quality has been strongly connected with headaches, dizziness, fatigue, nasal irritation, and effecting asthma.

Where Is the Air Filter Located?

Air Filtration

Usually, the air filter will be located in the return duct. Many return ducts are placed in attics, basements, crawlspaces, or garages. In some commercial spaces, they might be on a wall, on the ceiling, or in a utility closet. Some HVAC systems have return ducts in every room, which means you might find multiple air filters.

How Does the Filter Work?

When an HVAC system works properly, it filters out any harmful pollutants from the outdoor air. Proper filtration requires consistent maintenance and check-ups. On the contrary, lack of maintenance leads to pollutants like mold, mildew and bacteria becoming trapped in ducting and other components.

What Makes Filtration and Indoor Air Quality Important?

The Environmental Protection Agency suggests that indoor air can be, at a minimum, anywhere from 2 to 5 times more polluted than outdoor air. And indoor air quality is a top-5 environmental threat to public health. Furthermore, the American College of Allergy, Asthma & Immunology reports that half of all illnesses are caused or aggravated by low IAQ. Illnesses related to poor IAQ cost the U.S. economy $168 billion every year.

Beyond your use of proper filtration, a professional can help you improve indoor air quality by moving returns or ductwork. Humidity control is also essential; annual maintenance should include inspecting drain lines for sediment and other clogs that promote the growth of mold and mildew.

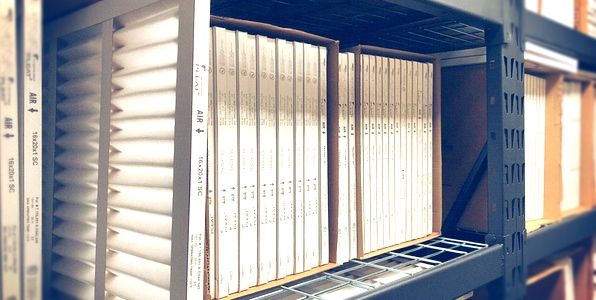
Different Types of Filters and Add-Ons

Fiberglass filters are disposable and inexpensive. They protect your HVAC system, but they don’t offer the best filtration available. Some low-end filters are washable and reusable, but the installation of a still-damp filter can lead to mold and mildew. Pleated filters are an affordable option that increase filtration efficiency, and they have the added bonus of quieting fan noise.

The best filters are High-Efficiency Particulate Air (HEPA) filters, which force air through a very fine mesh. While HEPA filters trap most airborne particulate matter, due to size and airflow restrictions, they can require modifications from an HVAC professional.

Add-ons to consider include smart thermostats, which allow you to control your entire system with the push of a button via your mobile device. There are also zoning systems, which use dampers to cool or heat individual rooms only when they are needed.

UV Light Add-on
UV LIGHT ADD-ON

Ventilators remove bad air and pull fresh air into a home at the same time. They also use heat-exchange technology to keep your home from losing its cooling or heating during this process. Humidifiers and dehumidifiers are classic methods to boost the fresh feeling of a home or office. Your personal comfort isn’t the only benefit of a humidifier or dehumidifier—your wooden products and electronics will benefit as well.

Maintenance and Repairs

Cleaning or replacing an HVAC filter is one of the most important tasks any homeowner or business owner can perform to keep an HVAC system running efficiently; luckily, it’s also quite easy and one that most people can perform themselves.

Be sure you purchase an air filter with a Minimum Efficiency Reporting Value (MERV) rating appropriate for your system; otherwise, you risk air leakage, increased energy use, or even a frozen coil. Filters with MERV ratings between 1 and 4 capture large debris, like pet hair, but they do not greatly improve indoor air quality. Those with MERV ratings between 5 and 12 capture mold spores, pollen, auto emission, and other smaller particles. Filters with MERV ratings 13 or greater, such as HEPA filters, trap cigarette smoke and most bacteria.

Consistent, proactive maintenance plans from HVAC professionals include inspection and cleaning of ducting, evaporator coils, lines, condenser coils, and vents, all of which promote high indoor air quality. You can further improve IAQ by installing ultraviolet lights that destroy mold, bacteria, and viruses. New products are released to the market every year designed to monitor and improve your indoor air quality.

4 Filters That Homeowners Should Check on a Regular Basis

Increase Efficiency and Protect Health

Filters are an important component of a healthy home life and yet, many of us overlook these tools, leaving them to gather dirt and dust for months at a time. While you may know that replacing your HVAC filters can improve energy efficiency, what about the rest of the filters in your home?

There are plenty of appliances throughout the average property equipped with their own filters. Some can be cleaned and re-used, while you’ll need to replace others on a regular basis. To help you clear up any confusion (and clear out the contaminants), we’ve put together a list of the top filters to check on a regular basis. Remember that neglecting your filters not only has an impact on your energy bill, but it could also harm your health, too.

1. Air Conditioner Filters

Air conditioners are a critical part of your HVAC system. They help to filter out bits of dust and pollen that would otherwise move through the home and reduce your indoor air quality. However, when filters become overworked or clogged, the efficiency of your HVAC system suffers. In fact, clogged filters are often a significant cause of HVAC failure.

Ideally, it’s best to change your filters at least every month or two — particularly if you live in a high-pollen area or have pets that could be shedding dander. Air filters are very inexpensive, and changing your filter is a simple task that you should be able to complete yourself.

2. Air Purifier Filters

An air purifier works to clear the air in your home. These systems collect various airborne particles, including dust, pet dander, and pollen. When your purifier traps these particles, they’re stored in the filter until you replace or clean it. Depending on the type of air purifier you have, you can simply clean and replace the filter; however, HEPA filters must be removed and replaced with brand-new filters.

While cleaning some filters is fine, your homeowner manual will advise how often to fully replace your specific filter. Sticking to these guidelines will help to keep your purifier functioning efficiently.

3. Clothes Dryer Filters

The lint filter and dryer vent on your clothes dryer are more crucial to your maintenance plan than you know. Dirty filters extend your drying time and skyrocket your energy bills. However, the dangers of a clogged clothes dryer filter go beyond higher bills. According to the NFPA, almost 15,000 structural fires take place each year because of an issue with a clothes dryer. What’s more, the majority of those problems come from dirty vents.

If your clothes are taking longer to dry than usual or they have an unusual burning smell about them, this could be a sign that your dryer vent isn’t properly getting rid of air. It’s worth checking and cleaning these filters at least once a month.

4. Bathroom Exhaust Fans

Finally, a clean and well-performing bathroom exhaust fan can help to prevent mold and other types of bacteria from growing. This can make cleaning your bathroom less tedious, and it also helps to protect your family’s health. To attend to your exhaust fan, simply open it up and check its appearance. If it’s been months since you scheduled a cleaning, then it’s definitely time to act.

You can easily dust an exhaust fan with a damp cloth or vacuum cleaner brush. It’s also worth removing the fan covers (if possible) and wiping down the blades with a cloth dipped in an all-purpose cleaner.

Keeping your Filters Clean

Ultimately, your home relies on a selection of filters to keep you comfortable and healthy. Unfortunately, since many of us live fast-paced and chaotic lives, it’s easy to forget about changing those filters. To avoid the unhealthy and often costly consequences of a clogged filter, make sure you check your home regularly for signs that a replacement is needed.

Remember you can always reach out to the team at Bob Jenson for help keeping your home air systems clean and efficient.

What is a Good MERV Rating for My Air Filters?

Why is a Good MERV Rating Important?

It’s important to maintain your air filters because they are the first point through which your residential air flow passes before it is dispersed throughout your home. These air filters are responsible for capturing the debris, dust, and hair in the air, help to improve your overall air quality, and can even help improve your personal health, too.

A majority of people are under the impression that outdoor air is the only element they need to worry about; but the truth is, indoor air quality can be a serious problem too. In fact, studies show that indoor air is up to ten times more polluted than outdoor air because of its exposure to and blending with to things like cleaning materials, pet dander, dust, and mold.

The key to protecting yourself from all these contaminants is to choose the correct filtration system… but how do you know which one is best for you and your home? That’s where you can use the Minimum Efficiency Reporting Value (MERV) system.

What is a “MERV” Rating?

MERV is the guide that is used to determine how successful a filter is at controlling the flow of unwanted particles into your home. Typically, the MERV scale ranges on a rating scale from 1 to 16. The higher the MERV rating, the better protected you are against contaminants.

The American Society of Heating, Refrigerating, and Air Conditioning Engineers (ASHRAE) designed the MERV rating system to help determine the efficiency of filters within an HVAC unit. During the testing phase, they expose filters to a range of common particles of various sizes, from mold spores and bacteria to dust mites and pollen. This helps to determine the filter’s effectiveness in keeping harmful elements and contaminants out of your home.

On average, a residential temperature control system with a rating between MERV 7 and 12 should be able to remove most airborne particles. These numbers are typically higher for clinical areas like hospitals.

Choosing the Right MERV Rating

When choosing an air filter, a MERV rating can help you to determine which options will give you the most protection against allergens, bacteria, and contaminants. For instance:

  • MERV Filters between 1-4: Filters with a rating between 1 and 4 will do little to stop harmful particles from entering the home. These filters are designed to trap larger particles like carpet fibers, dust mites, and pollen.
  • MERV Filters between 5-8: Filters with ratings between 5 and 8 are sufficient for some homes because they can trap particles that are as small as 3 microns, including animal dander, dust mite droppings, and mold spores.
  • MERV Filters between 9-12: Perhaps the preferred option for most residential spaces, these filters are almost as effective as “HEPA” filters when removing particles from indoor environments. They’re great for homes with people who have allergies, asthma, or other respiratory conditions because they can capture particles as small as a single micron.
  • MERV Filters 13 and up: If a filter has a rating higher than 13, it indicates that it’s exceptionally efficient and capable of trapping minute particles like bacteria and viruses. Usually, these appear in specialized HVAC systems, like those located at hospitals or manufacturing plants. Most residential systems won’t accommodate high-level filters like these without modification.

It’s tempting to assume that the highest MERV rating would offer the cleanest air quality – but that isn’t always the case because the MERV rating scale doesn’t follow strict logic. Therefore, it’s best to speak with a professional because they can recommend the most appropriate MERV filter for your home.

Caring for your HVAC Filter

Your air filtration system is crucial for two reasons. First, choosing the best filter helps to protect your system from airborne particles that might damage your system’s essential components, which could lead to overheating and potential damage. And second, choosing a filter with the right MERV rating ensures that you are receiving the best quality of air for your own health.

It’s important to remember that the MERV rating only indicates the minimum ability a filter has to capture airborne particles. Over time, filters begin to fill with dander and dust, which can render them unable to stop additional contaminants from passing through. A dense filter will quickly fill with debris and must be switched out often to keep your system working properly. But how often should you change your air filters?

Generally, most residential users will switch out their filters at the beginning of the season, but other factors like pets, people, and the pollution in your area could affect this frequency. Consult a professional about when and how you should switch out your filters so that you can maintain the best air quality in your home.

Remember that you’ll need to ensure that your HVAC can accommodate specific types of filters, and that choosing a higher rated filter can ultimately mean more maintenance. Our experts at Bob Jenson can offer assistance on choosing the perfect air quality filtration solution for your residential HVAC system depending on the unique needs of your home.

5 Simple Steps for Cleaner Indoor Air

Why the Need for Cleaner Indoor Air?

It isn’t only the air outside that’s subject to toxins, pollution, and chemicals – the air you’re exposed to indoors can actually be five times more toxic than outdoors. From CO2 particles to household cleaning products and air fresheners, your indoor environment can contain bad air that could be affecting your health and overall well being.

But clean air isn’t out of reach. In fact, the professionals at Bob Jenson Air Conditioning and Heating have a few simple steps for improving your indoor environments so you can start breathing easier in your home and at the office.

1. Stay Clean and Fresh Indoors

One of the easiest ways to improve air quality in your home is to keep the house clean with routine basic cleaning, like regular vacuuming. Always dispose of any garbage in a timely manner to keep your home smelling fresh and to avoid pest issues. Remember, cockroaches can cause respiratory illnesses, so address any infestations immediately.

A lack of circulation can be a big contributor to indoor air pollution at home and at the office. Make sure that there are plenty of opportunities to get the air moving inside. Open windows and doors, and use a fan to flush out toxins and CO2. If you or those around you are using chemical cleaners or paint, it’s even more important to let in some fresh air and usher the pollution outside. Better yet, do the painting outdoors or in an open garage.

2. Control the Source of Indoor Pollution

Generally, the most effective way to improve indoor air is to work on removing the things that are contributing to the flow of toxins in the first place.

If you’re unable to give up smoking, you should make sure that you smoke outside. Additionally, stay away from any chemical-rich deodorants or air fresheners. You also should not overdo it with certain beauty supplies, such as hairspray, that contain synthetic substances and can fill a closed bathroom. When it comes to cleaning your home or office, try to stick to green products and natural solutions like baking powder, lemon, and vinegar.

3. Manage Humidity and Oxygen Levels

Mold and dust mites are naturally drawn to moisture, so keep your humidity levels under control – particularly if you suffer from allergies. Ideally, you should aim for a humidity level of between 30 and 50%.

While you’ll want to reduce indoor humidity, higher levels of oxygen will improve the environment in your home and office. Houseplants are a fantastic solution for natural air purification, as they are able to remove up to 87 percent of the toxins in a room within about 24 hours. Just make sure you don’t over-water them, because this can contribute to higher humidity.

4. Install an Air Filtration System

Investing in a reliable air filtration system at home or in the office is a wise move if you want to keep your lungs in good working order. There are plenty of air quality purification systems on the market that are designed specifically to get rid of unwanted things like pollen, mold, dust mites, and bacteria.

A system with a high minimum efficiency reporting value (MERV) rating is your best bet for clean breathing. After all, the better the quality of the filter in your system, the more capable it will be of clearing out unwanted particles.

5. Perform Routine Maintenance

It’s essential to clean and replace the air filters in your HVAC system on a regular basis to prevent dust and debris from building up over time. How frequently you change your filters will depend on the type of filter, the amount of pollution indoors, and the number of people living or working in the space. You may need to replace it every month or at the beginning of a new season; the only way to know for sure is to routinely check your filter. For more serious maintenance, it’s your best bet to bring in a professional.

Contact Bob Jenson Air Conditioning and Heating today to speak to our team about how we can help you enjoy cleaner air indoors. We install and maintain air filtration systems and service HVAC units of all brands.

6 Indoor Activities That Harm Air Quality

Targeting the Culprits of Bad Indoor Air

The quality of the air in your home has a great impact on your family’s health. You may not realize it, but some common activities can have a negative impact on indoor air quality. Let’s take a look at a few of them.

1. Smoking

This is an obvious one. Smoking indoors is one of the biggest culprits of poor indoor air quality. The smoke irritates the respiratory tracts of residents, guests, and even pets. The dangers of secondhand smoke are very real: it can lead to pneumonia, bronchitis, asthma, and lung cancer. If you must smoke, be sure to do it outside.

2. Staining Wood

Wood stains contain a variety of harmful substances that travel through the air and can get into your lungs. This can lead to throat swelling and difficulty breathing.

Due to these dangers, you’ll want to avoid completing word-working projects inside the house where the fumes can’t escape. If working on a project that can be moved, work on it outside in the driveway or yard, or in an open, well-ventilated garage. Wait until the stain completely dries and has time to air out its fumes before bringing it inside. If you can’t avoid working on your project indoors, such as when refinishing the floors, open all the windows and run a fan or two help direct the fumes out of your home.

3. Painting

Painting is another project that can trap harmful fumes inside the home. In many cases, you can’t avoid doing this inside because it’s your interior that needs the work. For proper ventilation, ensure your windows remain open while you paint or apply primer to reduce the amount of dangerous fumes indoors. If you’re painting something smaller that can be moved outdoors, do so. This is especially true with spray paints. Always spray paint outdoors, and wear a mask for protection.

4. Cooking

Cooking is such a common everyday task that we don’t often associate it with danger or indoor air quality. However, many cooking appliances give off fumes that can be dangerous if not properly ventilated. Among these is nitrogen dioxide, which reacts with oxygen in the air to form toxic nitric acid and nitrates. Natural gas ovens, which make up about a third of all ovens in U.S. households, are particularly dangerous. Most kitchens with these ovens have fans for ventilation. Be sure the fan is running properly, and get it fixed promptly if it is not.

5. Common Household Products

Hair sprays, perfumes, solvents, cleaning agents, deodorizers, and other household products may seem harmless enough (and often smell nice), but the airborne chemicals in them can add up and negatively affect your indoor air quality. Volatile organic compounds can cause eye, nose, and throat irritation, headaches, and confusion. This is not to say you can never use hairspray — but it wouldn’t be wise to do it every single morning in a small, enclosed bathroom if you don’t have to.

6. Heating Equipment

Heating equipment is another potential culprit of indoor air pollution that can’t be simply avoided. Everything from furnaces to water heaters to fuel-fired space heaters can release carbon monoxide, which is a colorless, odorless, and very dangerous gas. Carbon monoxide can cause headaches and dizziness, respiratory and vision impairment, and flu-like symptoms. It can be fatal in high doses. Since it can’t be seen or smelled, carbon monoxide can easily go undetected. That’s why proper ventilation, strategically-placed carbon monoxide detectors, and routine furnace maintenance are essential to your family’s safety.

Wood burning stoves, gas ranges, unvented kerosene heaters, and more also spread respirable suspended particles into the air, which are particles small enough to inhale. This can cause eye, nose, and throat irritation, respiratory infections, and emphysema.

Many of these indoor activities can’t be avoided. That’s why it’s so important to ensure your house is well-ventilated and filtered. That way, you can significantly reduce these indoor air pollutants and decrease the risk of harmful side effects to your family.

Bob Jenson Air Conditioning and Heating installs and repairs HVAC systems of all brands, and we also offer customized air filtration systems for homes and businesses in San Diego County. Get in touch with us today to learn more about our services.

5 Easy Ways To Increase Airflow In Your Home

Let Your Comfort System Breath!

We all know what airflow is, but do what know what influences the airflow within our homes? Better airflow means the HVAC unit can move more heat and bring the air in the conditioned space to the desired temperature more efficiently. Reduced airflow means the HVAC unit cannot operate as effectively, reducing both its cooling capacity and energy efficiency.

The effects of poor airflow can ultimately result in equipment breakdowns — never a good thing, especially in the heat of summer when you rely on your AC the most! Fortunately, there are some simple ways you can evaluate and improve the airflow and air quality in your home.

1) Change Your Filter Regularly

One of the easiest ways to maintain proper airflow in your home is to change your HVAC unit’s filter regularly. This can also improve the air quality in your home, since your HVAC filter removes dust, pet dander, pollen, mold spores, bacteria, and more from the air that is being circulated in your space.

Manufacturers usually recommend that the filter be changed every three months, but your filter may get dirty well before that 90-day period ends, especially during the months when your unit is working the hardest. Take a peek at your filter on a regular basis. If it looks visibly dirty, replace it.

2) Use a Filter with an Appropriate Effectiveness Rating

A filter’s effectiveness rating is indicated by its minimum efficiency reporting value, or MERV. The MERV scale ranges from 1 to 16, with 16 being the very best. Most residential units can do the job well with a filter rated between 7 and 12; filters rated 13 to 16 usually are found in operating rooms and other sensitive settings where sterility is a concern.

3) Keep Indoor Vents Clean and Unblocked

Make sure air can flow through your vents unimpeded by moving any furniture or other obstructions that are too close to your vent. Go over the vents with a vacuum cleaner attachment regularly to keep the vent free from dust and other particles that can build up over time.

4) Check Ductwork for Leaks

If you have exposed ductwork running through an unconditioned space such as an attic, check it to make sure there are no leaks in the ducts. Even small leaks can reduce airflow, especially if there are multiple leaks. These leaks make your system work harder than it needs to, hurting its energy efficiency. You can check for leaks by running your hand just above the surface of the exposed ducts in your attic to feel for any drafts. If you find a spot where air is blowing through, seal the hole with sealant (mastic) or metal-backed (foil) tape. (Despite its name, don’t use duct tape.)

In a similar manner, check the spots where the ductwork goes through the attic floor. Seal any leaks you find with foam. Once all the leaks are sealed, use insulation on your exposed ducts to help keep the air inside them at the desired temperature as your HVAC unit moves it through your home.

5) Keep Tabs By Measuring Airflow in Your Home

There are a few methods you can use to measure the airflow in your home. Some involve specialized equipment that only HVAC professionals are likely to have, but there are a few DIY ways you can try. You can find detailed instructions here.

Even if you use these tips to help improve your home’s airflow, you may find it worthwhile to have a trained professional at Bob Jenson assess your home to determine if more substantial improvements can be made. Identifying and enacting these improvements will keep your home more comfortable, and could save you money over time with reduced cooling costs and emergency service calls. Contact us today to learn how we can help!

5 Steps to Removing Dust Mites from Your Home

How To Remove and Keep Dust Mites Out!

Dust mites are microscopic bugs that live in human habitats, particularly in your bed, carpet, couch, clothing, and soft furnishings. These pests thrive well in our home environments because they live off dead skin cells and pet dander. Regardless of how clean we endeavor to keep our homes, we’re all vulnerable to dust mites. After all, the average human sheds more than 8 lbs. of dead skin cells every year.

Though these tiny insects are usually harmless, in large numbers they can be problematic to people with allergies. During its lifetime, a dust mite can produce huge amounts of waste products. Research shows that this waste can cause complex human health complaints and allergic reactions, leading to coughing, congestion, breathing difficulties, and more. So, how can you remove dust mites from your home? Follow these 5 steps to start reducing the mite population in your property today.

Step 1: Learn How to Breathe Easy

One of the easiest steps you can take to protect your home from dust mites, is to adapt your internal atmosphere. Dust mites prefer environments that are warm and humid, so cooling things down by lowering your thermostat, and installing air conditioning can be a good first step. Keep your interior temperatures below 70°F, and limit humidity to lower than 50%.

Air conditioning can reduce your need to open windows, minimizing the amount of mold and pollen allowed into your home. Since dust mite waste can circulate in the air, it can also be helpful to invest in a specialist high-efficiency particulate air filter, or HEPA product, to restrict the presence of allergens.

Step 2: Wash your Bedding Regularly

Beds are one of the most welcoming places for dust mites. Not only are they dark and humid, but we humans shed a great deal of dead skin while we sleep, offering the perfect food source for mites. Fortunately, you can reduce your exposure to these pests by regularly washing your sheets at high temperatures of around 140°F.

If you have a tumble dryer, it may help to put sheets through a spin-cycle until they are completely dry. The excess heat in the dryer will take care of any mites or particles that might have survived the wash. Interestingly, some research suggests that a few drops of eucalyptus oil in your laundry can eliminate up to 99% of dust mites.

Step 3: Try Allergy-Proof Bedding

Since dust mites are naturally drawn towards bedding, it makes sense to take extra steps to protect yourself in the bedroom. Even the cleanest mattresses can be teeming with these pests. Though you may not be able to make your mattress completely mite-free, you can use specialist hypoallergenic mattress and pillow covers to reduce your exposure to irritating particles.

A mattress protector or cover will act as a barrier between you and the mites in your mattress, preventing your skin cells from entering their feeding zone, and stopping them from disrupting your sleeping patterns.

Step 4: Keep your Home Clean and Tidy

Although this may seem like an obvious solution to dealing with dust mites, it’s one of the most important ways to limit allergens and improve your home comfort. Conducting full home-wide cleaning sessions removes dust particles from your property. Try some of the following tips:

  • Start high and work your way down
  • Use damp cloths to dust walls, fan blades, shelves, picture frames, and anything that might collect dust
  • Remove obvious “dust collectors” in your living room and bedroom
  • Keep pets out of the bedroom to reduce pet dander
  • Vacuum and wash upholstered furniture regularly
  • Take down and wash your curtains every few weeks

When cleaning your home, remember that damp cloths will attract particles rather than move them around. Additionally, avoid sweeping, as this will simply send the dust into the atmosphere and displace it, rather than removing it completely.

Step 5: Keep Carpets Clean of Dust and Dander

Carpets are yet another preferred habitat for dust mites. Vacuuming regularly is a great way to prevent dust mites from breeding, but it’s important to remember that dry vacuuming is not effective at removing mites. Wet vacuuming and steam cleaning can help to offer a more comprehensive clean, as the heat of the moisture attracts the mites, and the heat of the steam kills them.
If you find that you’re struggling to keep your carpets clean, it may be beneficial to consider installing hardwood flooring with washable rugs that you can put in the laundry. Alternatively, purchase a HEPA filter vacuum for more specialist cleaning.

Reducing Dust Mites in Your Home

Unfortunately, it’s impossible to completely eliminate dust mites from the home. However, you can reduce the population of mites significantly, and limit your allergic responses by properly cleaning and protecting household items.

What Are Dust Mites and Why Should I Care?

The Invisible Threat

In the past, you may have heard of people talking about having a “dust allergy,” or struggling with dust that triggers the symptoms of asthma. Most of the time, the discomforts that these people are suffering with come from the droppings and byproducts of dust mites — tiny creatures that can congregate in their millions around your home.

These spider-like pests live in everything from your mattress to your pillows, carpets, and chairs. Though they are invisible to the naked eye, they can cause significant problems for homeowners by prompting allergies, discomfort, and even respiratory illness.

So, why should you care about dust mites? Well, approximately 20 million Americans are allergic to them, and if you’re one of those people, simply spending time in your home could be diminishing your quality of life.

What Are Dust Mites?

Dust mites are microscopic bugs within the spider family. These creatures live in the dust around your home and feed on the dead skin cells that you and your pets constantly shed. Though they’re too small to see, under a microscope they appear as white, eight-legged creatures.

Whenever you breathe in your home, you’re breathing in the waste products of dust mites, which can cause certain people’s immune systems to kick into high gear — developing antibodies to protect them against typically harmless substances. The result is typical allergy symptoms, which can range from sneezing and blurry eyes, to a runny nose.

The life cycle of a typical dust mite can last for up to four months. They start off as eggs and depending on the species it can take five weeks for an egg to become a fully-grown mite. Female mites lay up to 100 eggs in their lifetime, so it’s easy to see how infestations can quickly get out of hand.

Where Do Dust Mites Live and Thrive?

For a dust mite, the perfect home is a warm, humid area. Mites prefer temperatures of more than 70 degrees Fahrenheit and appreciate a humidity level between 75 and 80%. Because mites lose and absorb moisture through their skin, they can be vulnerable to dehydration and humidity levels. Their choice for a home will have a significant impact on their chances of survival, which is why you might want to consider making your home’s temperature as uncomfortable for them as possible.

Unlike with other household pests, food is rarely a problem for the average dust mite. Their primary source of sustenance is flakes of skin shed by humans or animals. Because we shed the greatest amount of skin in the areas we spend the most time, mites are most common in sofas, chairs, carpeted areas, and beds. What’s more, the relative humidity is often higher in these areas because people exhale water vapor and perspire when they sit and sleep. As your furniture traps and accumulates dust, it becomes a valuable microhabitat for mites.

Your home doesn’t need to be visibly dirty to support dust mites. Often, the mites and the particles that they consume are so tiny that you wouldn’t notice them unless you were searching with a high-powered microscope.

How Dust Mites Damage Your Health

One of the most important things to know about dust mites is that they cannot bite or sting you. These pests are only dangerous because they trigger severe allergies through their skin and secretions. The average house dust mite produces enzymes that are powerful enough to break down delicate cells.

For some people, exposure to dust mites is enough to prompt a powerful reaction similar to what you would experience with a pollen allergy. However, unlike pollen allergies which become worse at certain times of the year, dust mite allergies can present year-round issues with symptoms that include:

  • Constant sneezing
  • Runny, stuffy, or itchy nose
  • Dry, itchy, or watery eyes

What’s more, house dust mites can also cause additional health problems, such as allergic rhinitis (or hay fever), eczema, asthma, and may even impact other respiratory ailments.

The Danger of Dust Mites

Though dust mites are not parasitic creatures, capable of biting or stinging human beings, they are still a significant threat to the average homeowner. Dust mites can cause severe allergic reactions, and their ability to thrive in most U.S. conditions means that the typical home can quickly become infested with millions of pests.

Though these mites are small, you shouldn’t underestimate them. Reach out to Bob Jenson to learn how we can help limit the dust mites in your home.

Have You Replaced Your HVAC Filters Lately?

Why Replace Your HVAC Filters?

Heating and cooling systems contribute to around 48% of the typical energy use in a standard home — and with energy prices constantly on the rise, it pays to ensure your HVAC systems are as efficient as possible.

One of the simplest — and most effective — things you can do to reduce energy waste is to check and replace your HVAC air filters on a frequent basis. According to Energy.gov, changing your HVAC filters regularly can improve the efficiency levels in your equipment by 5% to 15%.

They may seem like just one small part of the whole system, but filters are one of the biggest factors affecting the efficiency of your unit, its lifespan, and even its impact on your health.

When Is it Time to Change your HVAC Filters?

Most property owners change their HVAC filters at the beginning of a new season, or when they know their equipment will need to work harder than usual. Some people change their filters once a month, for peace of mind.

A good rule of thumb is to change your filters whenever they’re dirty. Though “when they’re dirty” is different for each individual property, and living situation. The most accurate answer to “When should I change my HVAC filters?” actually depends on a number of factors, such as:

1. The type of air filter — Each type of air filter has a different lifespan. For instance, disposable filters generally don’t last as long as pleated filters. Research the expected lifespan for the type of filters you use.

2. The air quality indoors — If you (or your family members) suffer from frequent colds or allergies, especially if you notice these symptoms intensify inside the house, it may be a sign of poor indoor air quality. Changing your filters more often will improve the air quality.

3. The presence of pets — Usually, people with pets need to change their air filters more frequently, to avoid a buildup of dander.

4. The number of people present — The more foot traffic in the property, the more dirt and dust gathers in the air. If you have a large family, or entertain guests often, change out your filters more frequently.

5. The levels of pollution in your area — If your home experiences a high level of daily pollution, such as car traffic or regular construction debris, your air filters likely get dirty much quicker than those in less polluted regions.

Everything depends on the living conditions of your home, how hard your HVAC system works, and what kind of filters you’re using. If you change your filters once every couple of months, and notice that dust builds up in your property between changes, this is likely a sign you need to switch your filters out more frequently. Remember to check your filters more often during cold winters or hot summers.

What Are the Types of HVAC Filters?

One of the biggest factors dictating when you change your filters is the kind of filter you use. Today, homeowners have a range of choices in energy-efficient equipment, meaning that even something as simple as an air filter comes in many varieties. Here are some of the basic options available to you:

Economy Filters — These are disposable filters, and though they are inexpensive, usually have a poor filter rating, need replacing regularly, and may not perform as well as other options.

Pleated Filters — These filters can last from one to three months, and are more efficient than economy filters. They have a larger filter area but fit into the standard filter space.

High Efficiency Pleated Filters — Rated up to a MERV 16, these filters remove most contaminates out of the air and can last a year or more in some case. Though they filter really well, they also allow great airflow even as the filter continues to load up

HEPA FiltersHEPA filters are hospital grade and often the most efficient, but also the most expensive to purchase.

The Benefits of Changing your HVAC Filters

Changing your filters regularly keeps your energy costs down, by reducing the strain on your systems; but it will also keep you (and your family) healthier. Clean air filters reduce the number of toxins, pollutants, and allergens you breathe in every day. The more pure and filtered your air is, the less likely you are to suffer from allergies, respiratory symptoms, and other health issues.

Neglect and dirt mark the top causes of HVAC failure — one of the easiest ways to prevent system issues is to stay on top of your air filters. Every time you change them out, you’re improving your HVAC system’s lifespan, reducing the risk of breakdowns, and boosting your own health.

How To: Furnace Filter Guide

The Importance of a Furnace Filter

A home’s furnace is one of its most under-appreciated necessities. During the colder months of the year, furnaces are given a workout and without proper maintenance, it can lead to costly repairs or even needing a replacement.

One of the easiest, most inexpensive ways to protect your furnace and keep it running smoothly is to replace the air filter consistently – and use the most energy-efficient type of air filter possible for your unit.

Properly maintaining furnace air filters, and changing them on a regular basis, has a host of positive purposes beyond simply protecting your furnace. When you have a clean air filter, more dirt, dust and debris can be captured from the air in your home, making it cleaner to breathe. This can even heighten the comfort of people who live in the home that suffer allergies or asthma. A clean air filter is also more efficient – helping your furnace to function at a higher level while using less energy. This conserves energy and saves you money.

How Often Should I Change My Furnace Air Filter?

Energystar.gov says that basic home HVAC air filters should be changed once every month to once every three months — based on the type of furnace you use, and how often it is running. In high-peak months, the filter should be replaced every month if you want to have the cleanest air, and highest efficiency. Newer high efficient MERV 16 Filter can go for up to a year before it needs to be replaced! It’s also important to have a furnace checked by a professional HVAC technician before the peak season starts to make sure it runs smoothly when you need it the most.

Where Do I Find My Furnace Air Filter?

The location of your furnace filter will vary based on your furnace model and how it was installed. The most common places to locate your filter include:

  • The blower compartment. This is likely where you are going to find your filter if you have an older model of furnace.
  • A ceiling or wall grille. Usually it is located near the room or closet that the furnace is inside, and can be unlatched to easily pop furnace filters in and out.
  • In a cabinet with a door, attached to the actual furnace. Based on the model, it can be located on top, bottom or on the side.

What Type of Furnace Air Filter Should I Buy?

Air filters for your furnace will vary based on the type of unit. Furnace filters come as washable versions and disposable ones. Filters are also rated based on their efficiency value, reported in MERV. The higher the number, the smaller the filter particles (and higher the efficiency). Generally speaking, 4-5″ thick disposable furnace filters are more efficient, carrying a MERV rating of 8 to 16! Feel free to check with your trusted HVAC maintenance contractor to determine which type of filter you need for your furnace and home.

How Do I Install My Furnace Air Filter?

Once you’ve replaced your furnace’s air filter once, you will find it pretty easy in the future. The main thing is to ensure that you purchase the correct filter (if you use disposable ones, which are recommended for energy saving purposes). Once you know you have the right one, switch your furnace unit to the off position. Open the slot, grille or compartment where the filter will be inserted, and remove the old one. Slide the new one into place and close the lid/grille/drawer.

Properly maintaining furnace air filters is something that all residents can do with ease. Ask the filtration experts at Bob Jenson A/C for which air filter you should be using, how often to replace it, and what other suggestions for keeping your furnace running efficiently all year round.

  • 1
  • 2
Google Rating
5.0
Based on 955 reviews
×
js_loader

Schedule Service

"*" indicates required fields

By clicking “Send Message”, I am providing express written consent to receive autodialed and pre-recorded calls, texts, and SMS/MMS with marketing communications from Bob Jenson regarding home services at the phone number provided above, even if the number is on a corporate, state, or national Do Not Call list. Consent is not a condition to purchase services or products.

This field is for validation purposes and should be left unchanged.